Most adults experience low back pain at some point or another. It can be caused by various factors, like prolonged sitting or standing, carrying heavy objects (purses, backpacks, strollers), or by twisting or bending the wrong way. The following yoga poses are my go-to for relieving tension and pain in the low back.
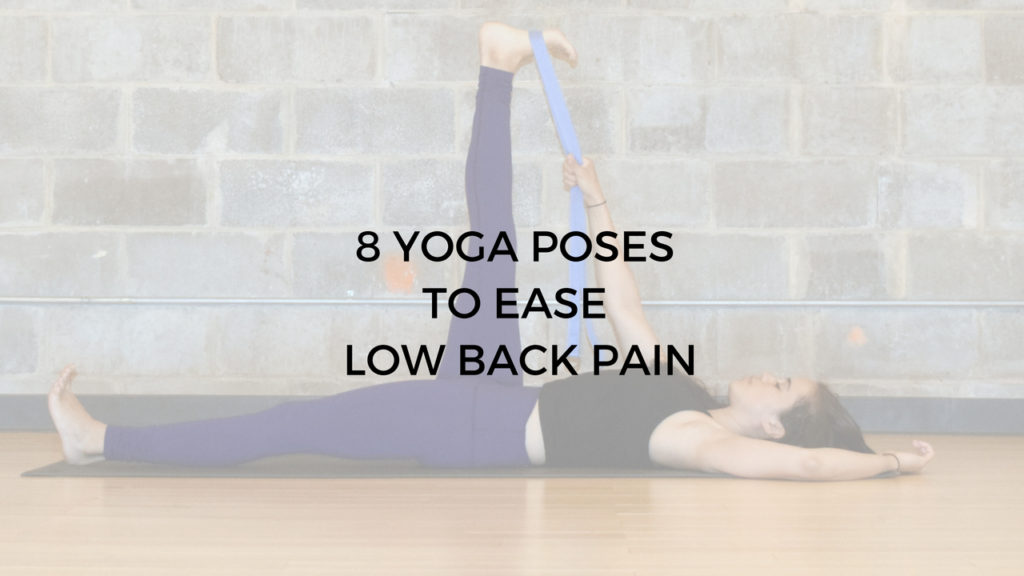
1. Reclined hand-to-foot pose
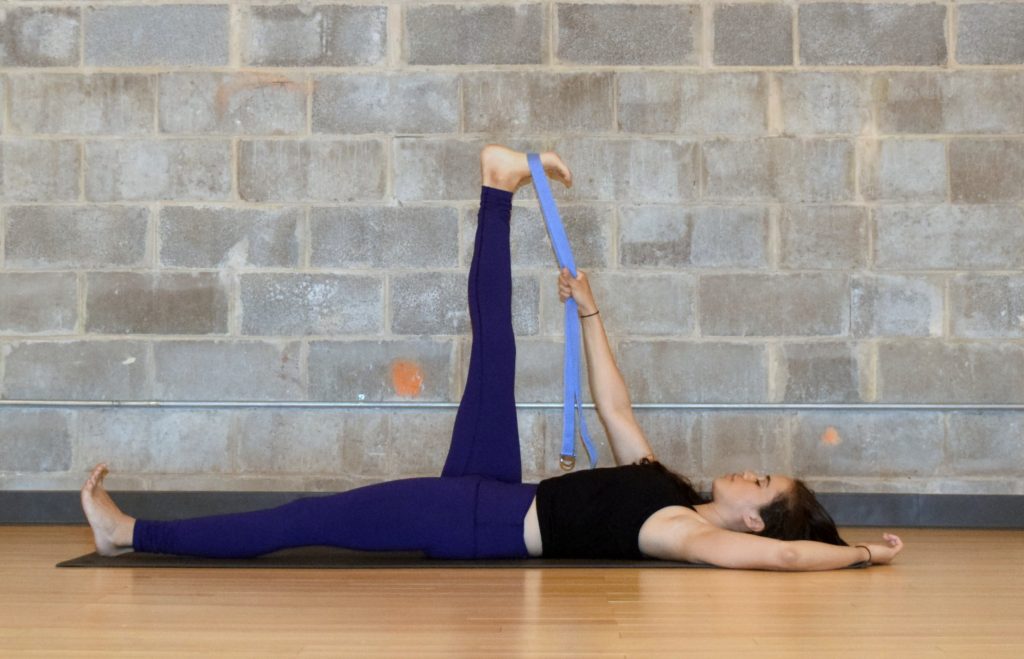
Begin lying on the back, with the soles of the feet flat on the mat and your knees bent. Hug the right knee to the chest, wrap a strap around the foot, and straighten the leg up towards the ceiling. Flex the foot for a deeper stretch and keep the leg perpendicular to the floor. You can keep the opposite leg bent, or straighten it forward.
2. Reclined Eagle Pose
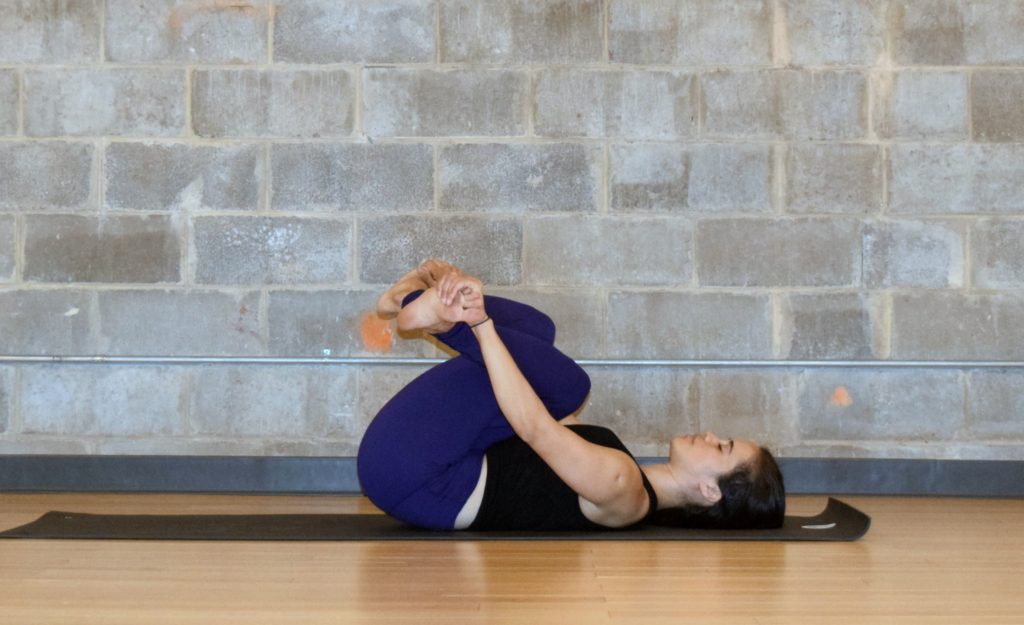
Begin lying on the back, with the soles of the feet flat on the mat and your knees bent. Cross your right thigh over your left thigh (as if you were sitting cross legged in a chair). With the legs crossed, bring the knees towards the chest, then lift the head and shoulders up and reach for the outer edges of the feet (with your hands on top of the feet, not the bottom).
If grabbing the outer feet is unavailable to you, reach for the outer shins instead. Lower the head and shoulders back down. If you find that your neck is sticking out (i.e. your chin is high), place a folded blanket or skinny block under your head as a pillow. This should help bring your neck into a more neutral position.
3. Reclined Twist
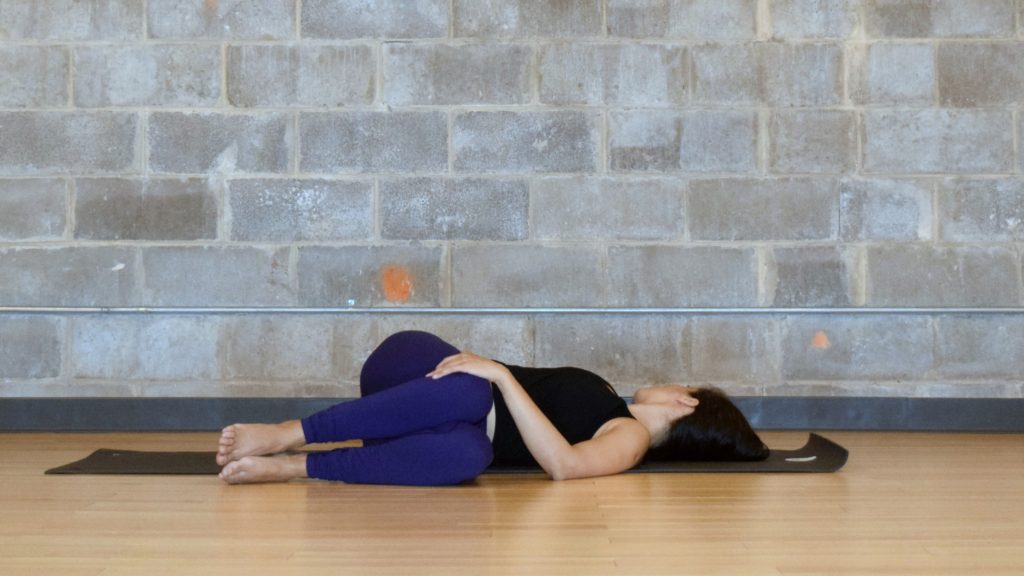
Begin lying on the back, with the soles of the feet flat on the mat and your knees bent. Lift your hips about an inch or two, then turn your them to the right, as you turn the knees to the left. Stack the thighs on top of each other and bring the knees up so that they are in line with the hips, or a little above (towards the belly button).
Reach your right arm (or both arms) out to the side into a T shape. Soften the ribs, chest, shoulders, and neck. Gaze over the opposite shoulder or towards the ceiling.
4. Malasana (Yogi Squat)
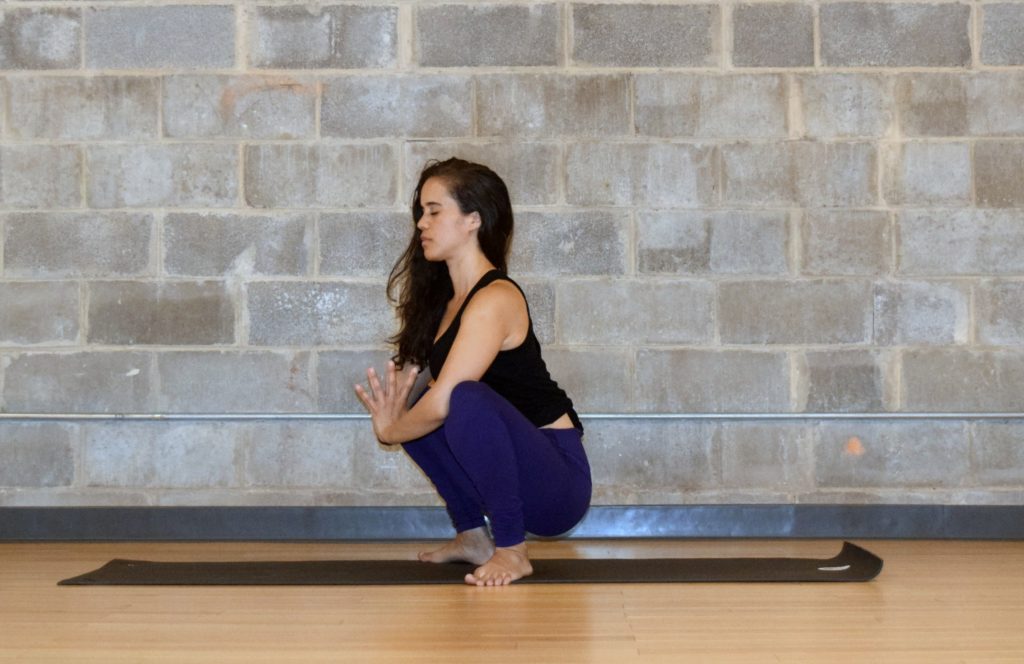
Begin standing on your yoga mat. Separate your feet about mat’s distance apart. Turn your heels in and your toes out (as if you were going to do a plie). Lower your hips down and bring your hands together at your chest. Press your upper arms into your inner thighs so that the thumbs come closer to the chest. Shift the weight towards the heels, engage your core, and lift the crown of your head up towards the sky.
If your heels are lifting off the ground, place a rolled up blanket or towel under them for support. You can also place 1-2 blocks under your sitting bones for support.
5. Triangle Pose (Trikonasana)
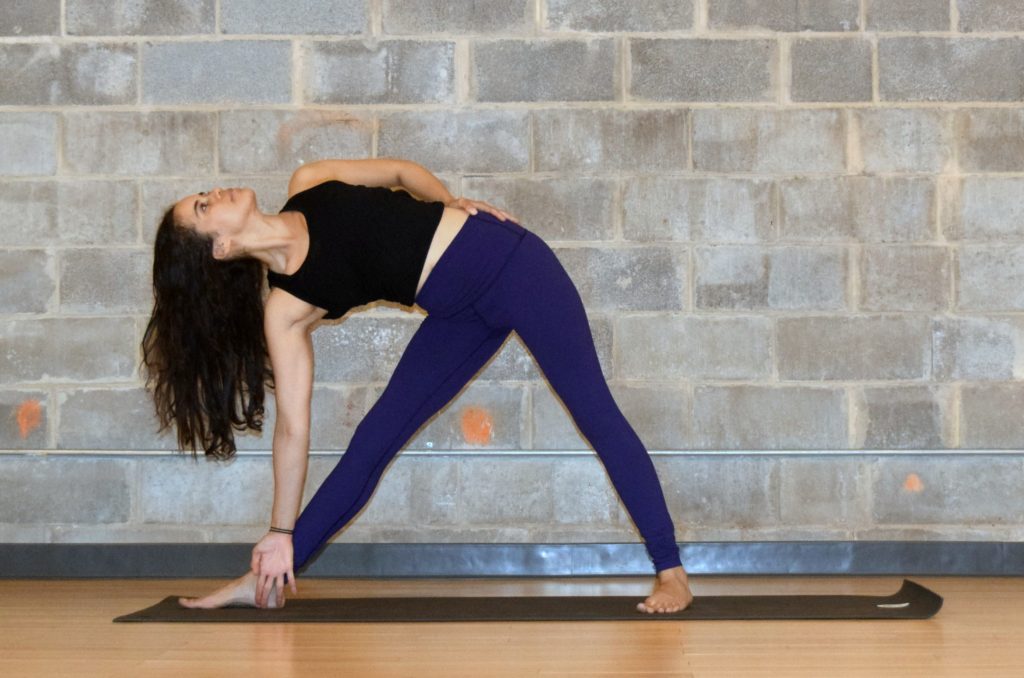
Begin standing with your feet facing the wide edge of your mat. Separate your feet about 3 feet from each other and turn the right foot out, and your left foot slightly in (so that it faces the top left corner of your mat). The position of the back foot will also bring your hips to turn towards the top left corner of the mat. The position of your feet will also cause your right thigh will turn out slightly, and your left thigh will turn in.
Extend the arms out into a T shape, reach the right arm forward, as if you were trying to touch the front wall, then lower the hand to your shin, or a block. Reach the opposite arm towards the ceiling or wrap it around the back.
Once you’re here, open the chest as if you had a wall behind you, reach the right sitting bone (the right butt), down and in, and squeeze thighs towards each other.
Come back up and repeat on the other side.
6. Supported Pigeon
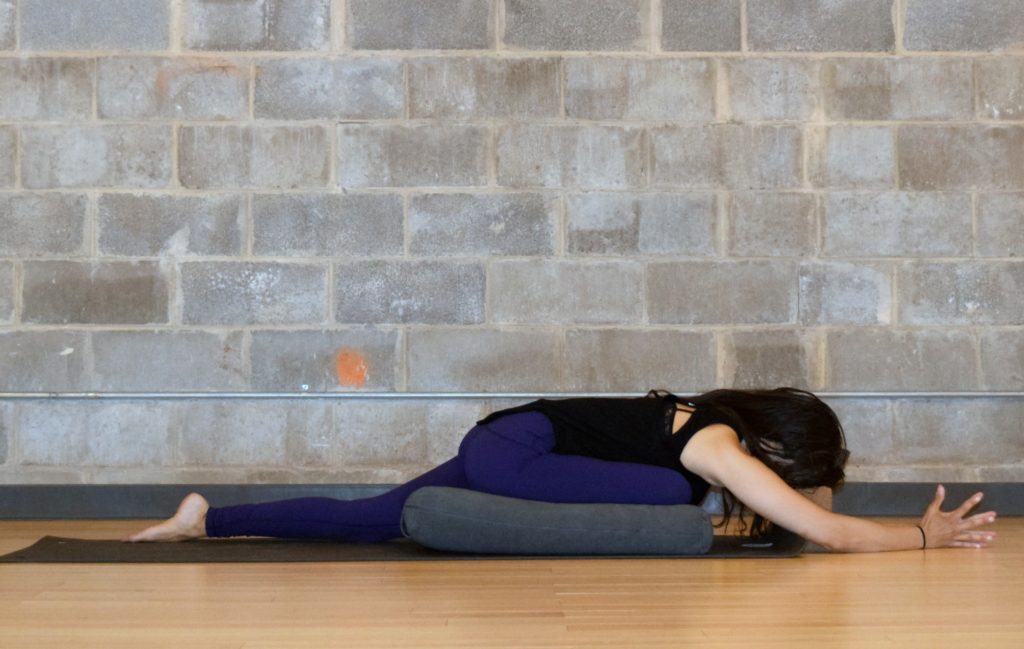
Start in hands and knees position (tabletop). Bring your right foot between your hands, walk it over to the left, and lower the shin down to the floor. Lift the back knee and slide it back a few inches, then lower the knee back down to the floor and point the back toes.
Now, place a bolster, or blanket/towel that has been folded into a rectangular shape, under your right thigh for support (be sure that the entire thigh is supported, from the knee to the hip).
Place your hands on the floor, in front of you, and start to walk them forward, lengthening the spine away from the hips as much as possible. Rest the head down to a block, or another bolster or pillow.
7. Sphinx Pose
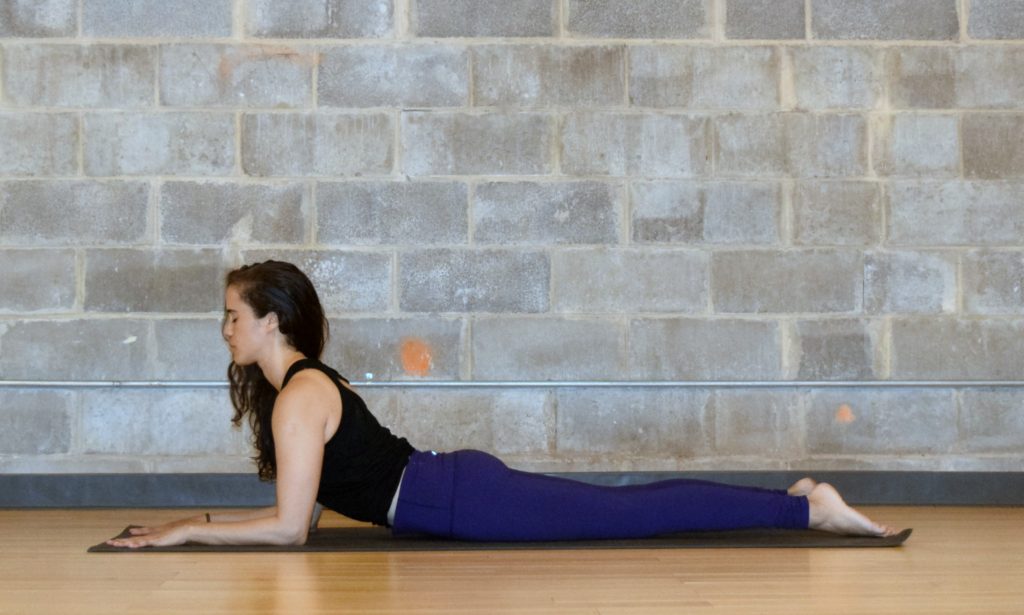
Lye down on your stomach and zip your legs together (big toes together, heels separated). Lift your chest up and position the forearms on the mat so that the elbows align under the shoulders. Draw the chest forward, shoulders back, and lift the belly up and the mat.
8. Leg-Up-The-Wall
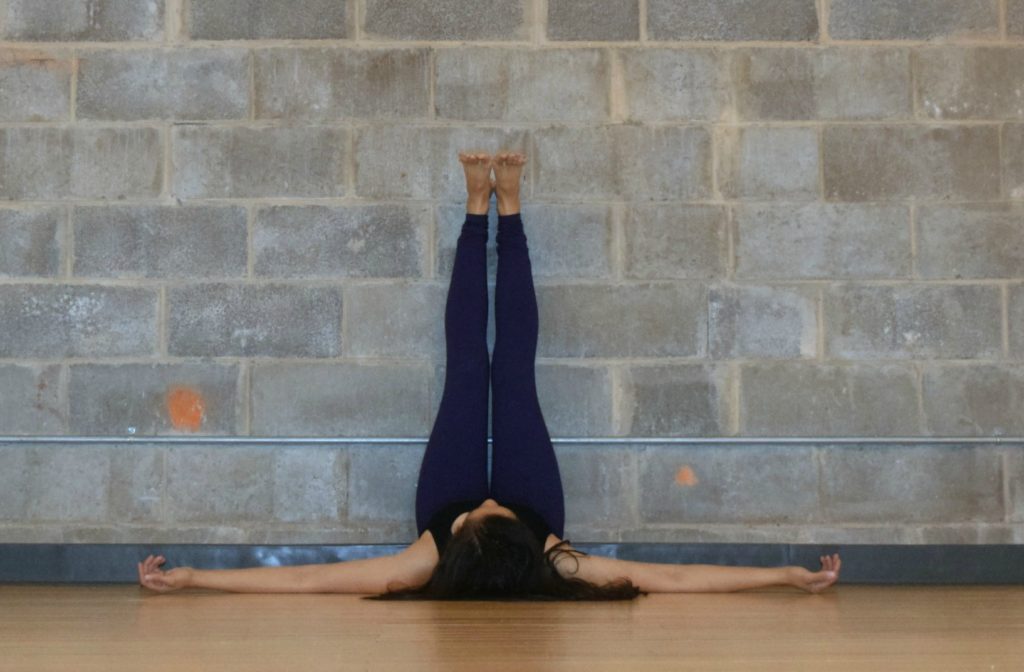
Sit with your right side, or left side against a wall. Lift your feet off the ground and turn your hips towards the wall. Once you’re here, reach the legs up and against the wall. Adjust your hips so that they are as close to the wall as possible.
SUBSCRIBE
Get weekly classes, meditations, and updates. Plus, get a 5-minute “mental-reset” meditation right in your inbox.
I love this! As someone who suffers from lower back pain from time to time this is really helpful. I’m always on the hunt for new yoga poses to help. Thanks for the info!
I love this! I suffer from lower back pain due to having a desk job. I practice Pilates and yoga fairly often and a lot of the stretches with ham strings and thighs I’ve found release the tight glute muscle which then loosens the tightness at my back. I’m going to try some more of these!